I moved to a new URL! Check it out!

posts tagged with: shaders

To Shader Hell and Back

To Shader Hell and Back
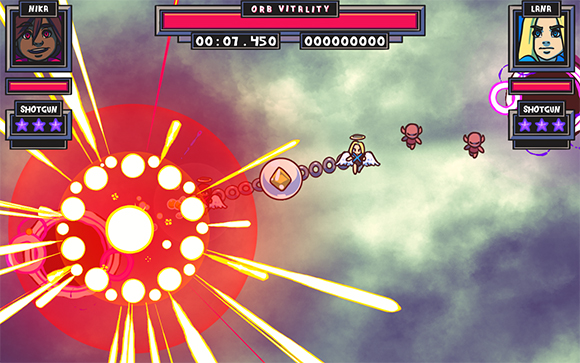
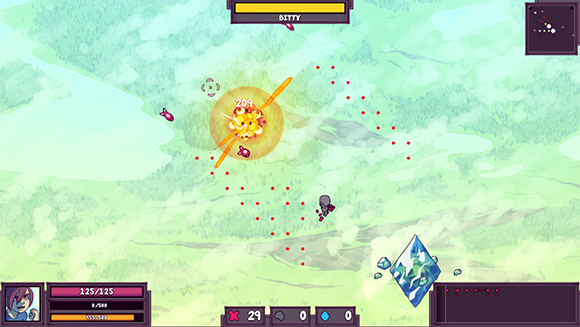
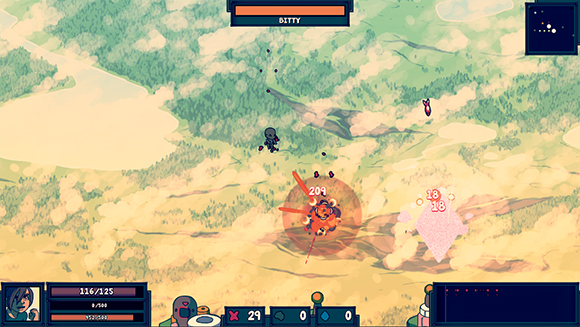
As I'm starting to send out builds of Super Sky Sisters for people to test I'm slowly churning through bugs and crashes that I was completely unaware of until the game runs on different hardware. One of those crashes is caused by creating way too many shaders so I've been investigating on how to address that for now.

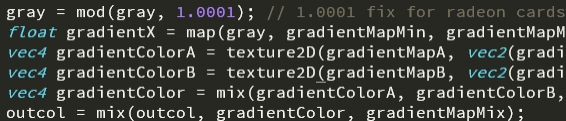
One big idea I had was to change how Otter uses shaders internally, but I think after some experiments this idea probably isn't going to work. The idea was to have Otter's Shader class keep a cache of compiled shaders instead of creating and compiling a new shader every time. Basically when making a shader it would check to see if an exact copy of that shader has already been created and compiled, and if so it would just use that one.

However that means that every sprite using the same shader would then also be sharing that shader's parameters. So if I wanted to change the color on an enemy, it would change the color on everything else as well. In order to get around that Otter's shader class would then have to manage and apply the shader's parameters before each render. So EntityA could set its parameters before rendering, and then EntityB could do the same.

I went down the rabbit hole a little bit with this technique but quickly found it performs like crap mostly. Iterating through every parameter per shader per entity per render becomes pretty chuggy pretty quickly. At first I thought this would be a pretty good idea since it would reduce hundreds of shaders to just 1, but the process of applying parameters before each render seems to be not the fastest thing in the world.

So now I'm back to the regular old way that Otter does shaders which is creates and compiles one for every shader instance. This has some downsides but I'm pretty sure it still ends up being faster than my experiment with a compiled shader cache.

I have some work ahead of me still to stop some of the crashes for Super Sky Sisters, but I'm pretty sure I know how to fix it it's just figuring out the right arrangement of code to implement the fix!

Otter Example: Shaders

Otter Example: Shaders
Welcome to shader town! One of the most exciting things about transitioning from flash to SFML was the use of GLSL shaders! Otter supports all the cool shader stuff that SFML does, and this example covers how to apply shaders to an image.

Check out some really quick example shaders being applied to a cool image of an otter.

Image

uniform sampler2D texture;

void main() {
vec4 pixel = texture2D(texture, gl_TexCoord[0].xy);
float gray = (pixel.r + pixel.g + pixel.b) / 3;

gl_FragColor = vec4(gray, gray, gray, pixel.a) * gl_Color;
}

Image

uniform sampler2D texture;

void main() {
vec4 pixel = texture2D(texture, gl_TexCoord[0].xy);

gl_FragColor = vec4(1 - pixel.r, 1 - pixel.g, 1 - pixel.b, pixel.a) * gl_Color;
}

Image

uniform sampler2D texture;

// A weird way to generate a random number with a vec2 seed I guess.
float rand(vec2 co){
return fract(sin(dot(co.xy ,vec2(12.9898,78.233))) * 43758.5453);
}

void main() {
vec2 samplePos = gl_TexCoord[0].xy;
samplePos.x += rand(samplePos) * 0.05;
samplePos.y += rand(samplePos) * 0.05;
vec4 pixel = texture2D(texture, samplePos);

gl_FragColor = pixel * gl_Color;
}
Shaders are the best!

Pretty Skies through Shaders

Pretty Skies through Shaders
For the full version of Super Sky Sisters I wanted to spend some time making a really cool looking sky backdrop for the action to take place on. The original prototype has a decent looking sky, but I think I whipped it up in under an hour and looking back at it now it looks like crap.

Image


So I turned to my old friend Photoshop for some advice. I played around with various ways of making a cool looking sky, and I eventually I came back around to using a Gradient Map to manage the colors of a black and white image. If you didn't know, I'm a huge fan of using gradient maps. When it comes to high resolution art I tend to have a lot of trouble with choosing palettes and maintaining that palette through the painting. It's really easy to muddy up the colors if I start eye dropping the wrong parts of the image, and working in high res really makes me miss the amount of control I have over my palette when working with pixel art... but gradient maps are a good band aid for this!

I feel like a broken record with gradient maps so I won't go into too much detail for this post on what they are. To put it simply an image's colors can be remapped to a new set of colors based on lightness. Here's a quick example of what that means.

Image


So how can I use this for painting skies? By using a gradient map to take care of all the colors all I have to do is paint up something in grayscale first...

Image


And then I can spend a little time making a nice sky colored gradient...

Image


Then I can apply that to the image as a gradient map and like some kind of magic my image has awesome colors!

Image


My idea for the sky at this point was to have one static sky image, and then decorate it with a bunch of varied cloud sprites. The total amount of assets I use for rendering the sky are as follows:

Image


Image


Image


My first thought at this point was to just apply the gradient map to the asset directly and export it with the blue colors baked in. If I did it that way then I wouldn't need to worry about using any shaders in the game, and I thought that would be the best bet, but I quickly ran into an issue with the color.

It turns out baking a gradient map into an image with alpha has pretty undesirable results. Check out how one of the clouds look when the gradient map is baked in.

Image


When using these sprites on top of an already baked in sky background I end up getting some colors that are less than ideal. Some parts come out grey and white and black which can look pretty ugly. So I ended up scrapping the whole baked in gradient map idea.

Instead I just exported all of my assets in grayscale and also exported the gradient. I then applied a relatively simple shader just to apply that gradient map to the image. In Otter I'm using a Surface to render the entire sky to. That surface then has the shader along with the gradient texture. The result looks like this:

Image


It looks incredibly cool in motion, but unfortunately it's tough to show it without a full video recording. There's too many colors going on for a gif to really show how cool it looks.

A cool side effect of using a shader with a real time gradient map application is that I can switch to a different gradient and the sky can be totally different. For example I can take a gradient that looks like this:

Image


And the sky then looks like this:

Image

Dev Log: Super Sky Sisters Screenshots

Dev Log: Super Sky Sisters Screenshots
Sorry about the silence on my blog lately but I've been pretty heads down getting a lot of stuff done on Super Sky Sisters, my two player action co-op game! I'm planning on having the game totally playable by the time the Game Developers Conference rolls around early next month, so I've been pretty focused on it.

Here's what it's been looking like lately:

Image


Image


Image


Image


I'm planning on going into a bit more detail on some things like how I'm rendering particles and the sky background for this game because I have some cool shader stuff going on. Also rendering those big red spiky blocks (or stamps as someone has called them) involves a neat shader trick as well. Back to work!

Index Palette Shader

Index Palette Shader
A few months ago I made and released a game jam game that featured a cool shader based off of Dan Fessler's HD Index Painting tutorial. The idea is to take a normal image and render it with an extremely limited palette. Essentially it's like a game boy shader, and with the help of a dither map texture it actually creates the illusion that there are more colors than there actually are.

Image


The game jam version of the shader was rather clunky, and required the game to manually render a dither texture over the entire screen. Yesterday I spent some time figuring out how to apply the dither directly in the shader itself to make it more general purposed. Here's the entire shader:
#version 130
uniform sampler2D texture; // The main input texture (the screen.)
uniform sampler2D palette; // The palette texture.
uniform float shift; // The shift amount on the palette texture.
uniform float offset; // The offset for the random noise generation.
uniform float screenScale; // The current scale of the screen. (1x, 2x, etc)
uniform vec2 screenSize; // The size of the core game screen (320 x 240)
uniform float noiseAlpha; // The amount of alpha the noise should have.

// A weird way to generate a random number with a vec2 seed.
float rand(vec2 co){
return fract(sin(dot(co.xy ,vec2(12.9898,78.233))) * 43758.5453);
}

void main() {
// The size of the game window.
vec2 screenSizeScaled = screenScale * screenSize;
// The pixel coordinate being operated on.
vec2 pixpos = gl_TexCoord[0].xy;

// Get dither pixel
vec2 overlayCoord = floor(gl_FragCoord.xy / screenScale);
// Get 1 or 0 based on the pixel location.
float overlayPixelColor = mod(overlayCoord.x + overlayCoord.y, 2);
// Dither is black and white every other pixel.
vec4 overlayPixel = vec4(overlayPixelColor, overlayPixelColor, overlayPixelColor, 1);

// Scale the frag position to match the screen scale
vec2 scaledpos = floor(pixpos * screenSizeScaled);
// Adjust the position based on the scale of the screen.
scaledpos -= mod(scaledpos, screenScale);
// Convert back to 0 - 1 coordinate space.
scaledpos /= screenSizeScaled;

// Get base color.
vec4 pixcol = texture2D(texture, pixpos);

// Mix dither texture.
pixcol = mix(pixcol, overlayPixel, 0.1);

// Determine the brightness of the pixel in a dumb way.
float gray = (pixcol.r + pixcol.g + pixcol.b) / 3;

// Round it to the nearest 0.25.
gray = round(gray / 0.25) * 0.25;

// Add some noise.
gray += (rand(scaledpos + offset) * 2 - 1) * noiseAlpha;

// Map the palette to the pixel based on the brightness and shift.
pixcol = texture2D(palette, vec2(gray, shift));

// Multiply through the gl_Color for final output.
gl_FragColor = pixcol * gl_Color;
}

The shader does require a 2d texture for the palette itself. For this game the palette I used was this:

Image


The "shift" uniform in the shader determines the Y coordinate to sample the palette on. A shift of 0 will sample the top most Y, and a shift of 1 will sample the bottom most. You can use this to dynamically change the palette during the game.

The shader needs to have the "screenScale" uniform set to the current scale of the screen. This will make sure that the pixel size is corrected for the dither and the noise. The shader also needs to know the "screenSize" in order for the noise pixels to be the correct size. You can also just set the "noiseAlpha" to 0 if you don't want any of that stuff to show up.

To make the noise change every update the "offset" value should be set to a random float 0 - 1 every update.

Here's what the game looks like without the shader:

Image


And turning on the shader:

Image


Neat!

Dev Log: Color Grading Shader

Dev Log: Color Grading Shader
I love post processing shaders! I think they're one of my favorite things to mess with now that I have a cool C# game making framework to play around with. One of my latest experiments was implementing color grading into Stratoforce, and by extension all of my future games built with Otter.

What's color grading? Basically you have a texture that contains every single color possible on it. This texture is usually referred to as a Look Up Table, or LUT. When your texture, or your game, or whatever goes to render itself, the shader can remap all of its colors to the colors on the LUT texture.

Check out these links for more details:
* Unreal Engine Color Grading
* Simple Color Grading for Games
* Color Grading: Another cool rendering trick

So here's what Stratoforce looks like with a normal color table:

Image


And here's a quick test on color grading:

Image


Whoa look at how different all the colors are! The effect is really powerful as it allows you to apply any sort of color corrections to the whole game in real time.

Here is my work flow for creating a color table and using it to alter the colors of the game:

* I downloaded a standard LUT texture from Epic: RGBTable16x1.png

* I took a screenshot of my game with the RGBTable superimposed on the top left corner of the screen.

* I brought the screenshot into Photoshop and played around with some adjustment layers: Hue/Saturation, Color Balance, Curves, etc.

* I then copy merged the RGBTable image from that document and exported it as a new png file.

* I used that png file as the LUT table for the color correction in the shader.

So the standard RGB table looks like this:

Image


And the modified version from the Photoshop file comes out looking like this:

Image


Now the LUT texture gets loaded into a shader as a 3d texture. Whoa a 3d texture! I didn't even know that a 3d texture could exist until yesterday. Basically imagine a cube that is composed of every color possible. The x y z of the cube is actually r g b! That's why the look up table texture looks like a series of squares. Notice how its 16 x 16 x 16 pixels. Crazy, right?

So here's what I had to do for my GLSL shader in Otter:
// Apply the color grading
//pixel is input color, colorGrade is sampler2D of LUT.
vec4 gradedPixel = sampleAs3DTexture(colorGrade, pixel.rgb, 16);
gradedPixel.a = pixel.a;
pixel = gradedPixel;

Since SFML by default only binds textures as 2D textures in OpenGL, I had to find a work around for loading a 2d texture as a 3d one. I found a work around here and used it in my shader.
vec4 sampleAs3DTexture(sampler2D texture, vec3 uv, float width) {
float sliceSize = 1.0 / width; // space of 1 slice
float slicePixelSize = sliceSize / width; // space of 1 pixel
float sliceInnerSize = slicePixelSize * (width - 1.0); // space of width pixels
float zSlice0 = min(floor(uv.z * width), width - 1.0);
float zSlice1 = min(zSlice0 + 1.0, width - 1.0);
float xOffset = slicePixelSize * 0.5 + uv.x * sliceInnerSize;
float s0 = xOffset + (zSlice0 * sliceSize);
float s1 = xOffset + (zSlice1 * sliceSize);
vec4 slice0Color = texture2D(texture, vec2(s0, uv.y));
vec4 slice1Color = texture2D(texture, vec2(s1, uv.y));
float zOffset = mod(uv.z * width, 1.0);
vec4 result = mix(slice0Color, slice1Color, zOffset);
return result;
}

It seems like the real magic is using this dynamically in a game. Interpolating between various LUT textures for different effects seems like it could be really interesting! I'm excited to play around with this kind of stuff more while procrastinating on solving the hard problems of working on this game.