I moved to a new URL! Check it out!

posts dated from: october 2014

Dev Log: Skeletons

Dev Log: Skeletons
This past week I've been chipping away at some general changes to Otter as well as doing some quick experiments with some things that I eventually want to include in my bigger game project.

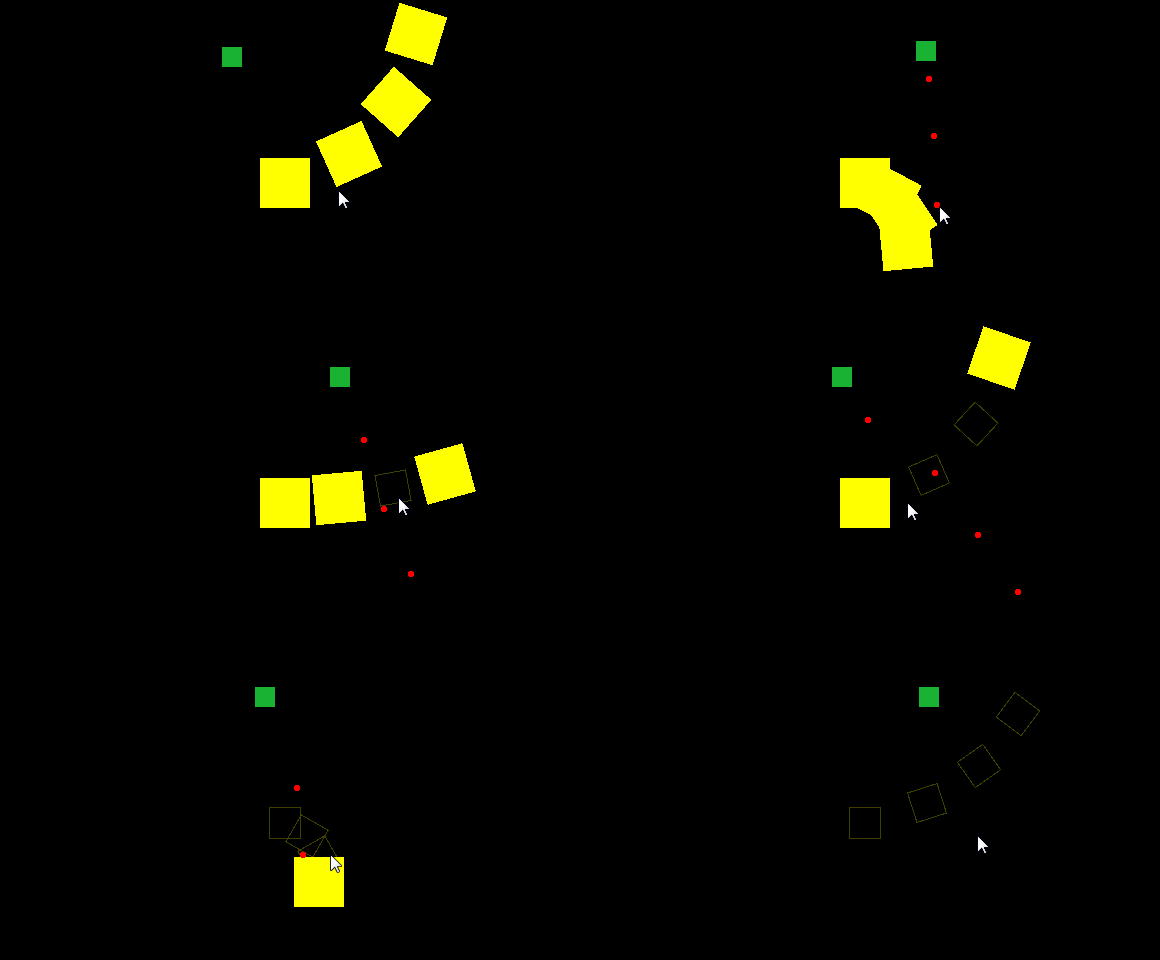
The most recent of these experiments is setting up a general purposed skeleton system. The main idea is that I want to be able to make up enemies and other objects with a bunch of individual pieces that move around and animate. Normally I could say just using something like Spine or Spriter is good enough for this, but for this I wanted something of my own creation.
Image


The idea is that there is a Skeleton Entity in Otter that contains bones that all move, rotate, and scale based on their parent. Typical skeleton bone behavior. The difference is that each bone can hold an Entity on it. Each individual Entity on the bone can then have its own logic, so for example the first thing I want to have is the ability to destroy individual pieces of the skeleton. I can do that by having the Entities on each bone have logic for taking damage and being destroyed.

Image


So far I have one early iteration of this working but I'm realizing that the math that programs like Spine and Spriter do might be slightly different, and I'm trying to figure out exactly how they approach their transformations. It's a little difficult to find any articles or tutorials on how to code this stuff up yourself, as most people assume that using Spine or Spriter is what you want to do. I could potentially go back to using Spine and try to figure out how to wrangle its data format into loading a Skeleton into my custom format, but sometimes just making something yourself from scratch ends up being more straight forward!

Doodle Post

Image

Dev Log: Color Grading Shader

Dev Log: Color Grading Shader
I love post processing shaders! I think they're one of my favorite things to mess with now that I have a cool C# game making framework to play around with. One of my latest experiments was implementing color grading into Stratoforce, and by extension all of my future games built with Otter.

What's color grading? Basically you have a texture that contains every single color possible on it. This texture is usually referred to as a Look Up Table, or LUT. When your texture, or your game, or whatever goes to render itself, the shader can remap all of its colors to the colors on the LUT texture.

Check out these links for more details:
* Unreal Engine Color Grading
* Simple Color Grading for Games
* Color Grading: Another cool rendering trick

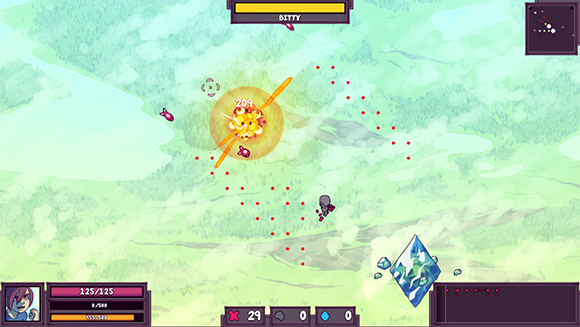
So here's what Stratoforce looks like with a normal color table:

Image


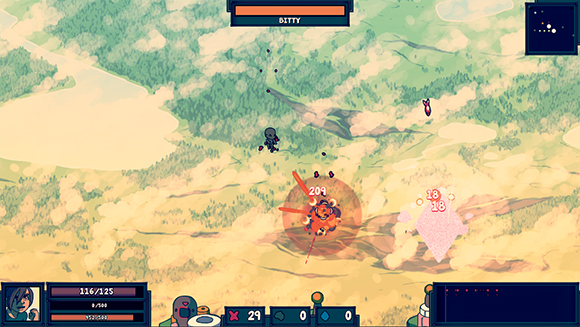
And here's a quick test on color grading:

Image


Whoa look at how different all the colors are! The effect is really powerful as it allows you to apply any sort of color corrections to the whole game in real time.

Here is my work flow for creating a color table and using it to alter the colors of the game:

* I downloaded a standard LUT texture from Epic: RGBTable16x1.png

* I took a screenshot of my game with the RGBTable superimposed on the top left corner of the screen.

* I brought the screenshot into Photoshop and played around with some adjustment layers: Hue/Saturation, Color Balance, Curves, etc.

* I then copy merged the RGBTable image from that document and exported it as a new png file.

* I used that png file as the LUT table for the color correction in the shader.

So the standard RGB table looks like this:

Image


And the modified version from the Photoshop file comes out looking like this:

Image


Now the LUT texture gets loaded into a shader as a 3d texture. Whoa a 3d texture! I didn't even know that a 3d texture could exist until yesterday. Basically imagine a cube that is composed of every color possible. The x y z of the cube is actually r g b! That's why the look up table texture looks like a series of squares. Notice how its 16 x 16 x 16 pixels. Crazy, right?

So here's what I had to do for my GLSL shader in Otter:
// Apply the color grading
//pixel is input color, colorGrade is sampler2D of LUT.
vec4 gradedPixel = sampleAs3DTexture(colorGrade, pixel.rgb, 16);
gradedPixel.a = pixel.a;
pixel = gradedPixel;

Since SFML by default only binds textures as 2D textures in OpenGL, I had to find a work around for loading a 2d texture as a 3d one. I found a work around here and used it in my shader.
vec4 sampleAs3DTexture(sampler2D texture, vec3 uv, float width) {
float sliceSize = 1.0 / width; // space of 1 slice
float slicePixelSize = sliceSize / width; // space of 1 pixel
float sliceInnerSize = slicePixelSize * (width - 1.0); // space of width pixels
float zSlice0 = min(floor(uv.z * width), width - 1.0);
float zSlice1 = min(zSlice0 + 1.0, width - 1.0);
float xOffset = slicePixelSize * 0.5 + uv.x * sliceInnerSize;
float s0 = xOffset + (zSlice0 * sliceSize);
float s1 = xOffset + (zSlice1 * sliceSize);
vec4 slice0Color = texture2D(texture, vec2(s0, uv.y));
vec4 slice1Color = texture2D(texture, vec2(s1, uv.y));
float zOffset = mod(uv.z * width, 1.0);
vec4 result = mix(slice0Color, slice1Color, zOffset);
return result;
}

It seems like the real magic is using this dynamically in a game. Interpolating between various LUT textures for different effects seems like it could be really interesting! I'm excited to play around with this kind of stuff more while procrastinating on solving the hard problems of working on this game.

Doodle Post

Image


Distracted by doodling lately!

Dev Log: Bezier Curves

Dev Log: Bezier Curves
This week has kinda sucked for game development stuff. I'm not really sure why, but I just haven't really felt super inspired to work on anything lately, and when I do try to work on things I feel like everything I make is just terrible so I procrastinate. It's a vicious cycle! So I tried to think of maybe something I can add to Otter because that should be easy enough.

I decided to try and just learn about bezier curves in more detail. I've never used them in a game, but it seems like they would be handy in a lot of aspects of game development. I found this quick tutorial and got started with recreating the example code in Otter.

Image


Although... I'm not sure if this is looking quite right. I'm pretty sure I'm doing the same exact code in the example, but for some reason every curve on my bezier path has sharp end points with the next curve on the path... so for now I'm going to have to look into this further, but the current source is in the Util class in Otter's dev branch if anyone wants to give it a look!

Otter Updates

Otter Updates
Some quick updates to Otter in the dev branch!

* Added the Polygon class: For the Polygon collision stuff I created a quick helper class to keep track of the points in a polygon. This class also has some neat functions that are used in the Collider class to figure out polygon collision stuff.

* Added PolygonCollider: Now there is an actual PolygonCollider in Otter! You can use it to check for collisions with any other type of collider too. I expect there to be some bugs so be on the look out when using it.

* Various Collider Updates: Some of the colliders had some minor bugs so I squashed all of the ones I could find.