


Border Image Magic
Here's another hot web tip! Did you know about border-image?! It's what I've been searching for in my web design projects since I was 14 years old.
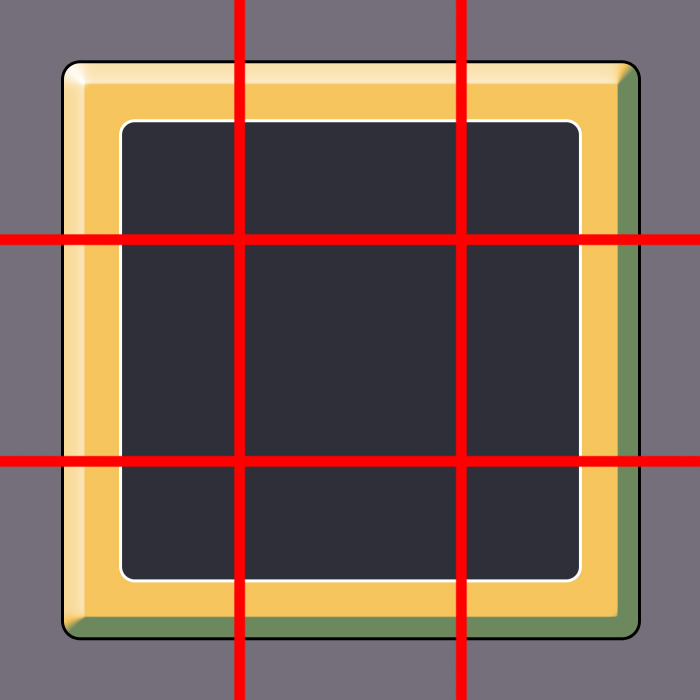
So lets talk about the world of designing image intense websites before I discovered the magic of border-image. In order to have a div element have some sort of image border I had to take an image and slice it up a bunch of different ways depending on how dynamic the div was going to be. If it was a div that would only ever stretch vertically then I could get away with 3 images: one for the top, another for the bottom, and the last for the repeating vertical portion. If the div was going to be stretched both vertically and horizontally then the number of images increases to a whopping 9! Each corner, each side, and the center. Sometimes this is known as a nine slice in certain user interface contexts.
Way back in the day when it was only possible to have one background element inside of a div I had to do things like have multiple layers of divs in order to display each background image. Three slices of an image meant three divs to display it properly. Nine slices meant nine divs! As you can imagine this makes the html look bloated and messy.
Then came along multiple background images. You can actually see this employed on the sidebar when my blog is at its highest possible resolution. The sidebar sections are composed of divs that have three backgrounds. One for the top, another for the bottom, and the last one for repeating vertically. Initially this was the only way I knew how to accomplish this, but then some quick googling lead me to discover border-image: the ability to use a nine sliced image for the border and background of an element (although the background portion doesn't work so great on non-chrome browsers, but there's a quick way around that in my case.)
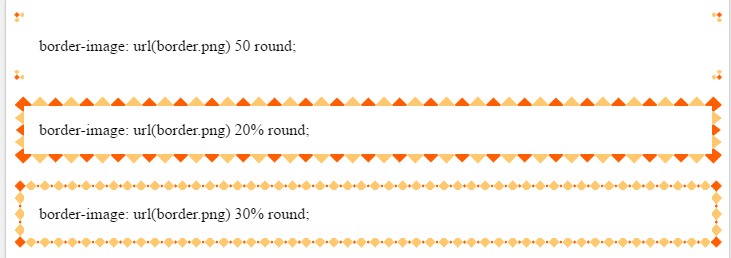
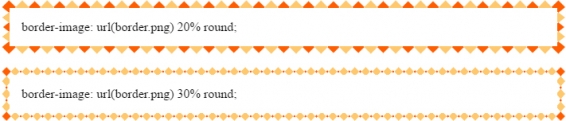
Border image will take an image and slice it up into 9 different pieces and use those pieces to decorate the border and fill of the element. No more multiple backgrounds, no more stacking 10 divs up in order to get a cool looking design, just one css property to handle it all now! Check it out on w3schools.
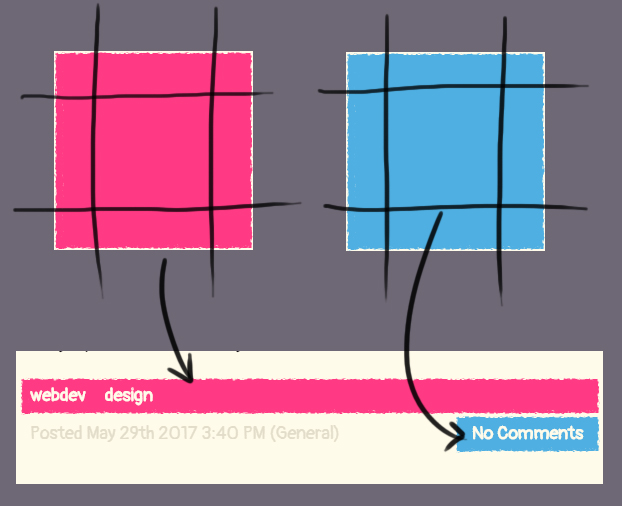
If you look directly below this post where the tags are, and the comments link, you'll see border-image in action. In my case I wanted to have a bunch of different ways to make blocks on the design, but give each block that rough pencil texture look for the border. Border-image made this incredibly simple, and the only fix I had to do at the end was also set the background color of each box for browsers like Safari and Firefox.
Border-image is an essential tool in my web design kit now, but if you really want to see some insanity check out the relatively recent flex stuff! I used that on my draws page for organizing all of the thumbnails, and for the tag list on the right side of the blog. I'm still figuring out some issues I've hit with it like aligning the last row of flex items, but it is a fast and easy way to organize elements.
So lets talk about the world of designing image intense websites before I discovered the magic of border-image. In order to have a div element have some sort of image border I had to take an image and slice it up a bunch of different ways depending on how dynamic the div was going to be. If it was a div that would only ever stretch vertically then I could get away with 3 images: one for the top, another for the bottom, and the last for the repeating vertical portion. If the div was going to be stretched both vertically and horizontally then the number of images increases to a whopping 9! Each corner, each side, and the center. Sometimes this is known as a nine slice in certain user interface contexts.
Way back in the day when it was only possible to have one background element inside of a div I had to do things like have multiple layers of divs in order to display each background image. Three slices of an image meant three divs to display it properly. Nine slices meant nine divs! As you can imagine this makes the html look bloated and messy.
Then came along multiple background images. You can actually see this employed on the sidebar when my blog is at its highest possible resolution. The sidebar sections are composed of divs that have three backgrounds. One for the top, another for the bottom, and the last one for repeating vertically. Initially this was the only way I knew how to accomplish this, but then some quick googling lead me to discover border-image: the ability to use a nine sliced image for the border and background of an element (although the background portion doesn't work so great on non-chrome browsers, but there's a quick way around that in my case.)
Border image will take an image and slice it up into 9 different pieces and use those pieces to decorate the border and fill of the element. No more multiple backgrounds, no more stacking 10 divs up in order to get a cool looking design, just one css property to handle it all now! Check it out on w3schools.
If you look directly below this post where the tags are, and the comments link, you'll see border-image in action. In my case I wanted to have a bunch of different ways to make blocks on the design, but give each block that rough pencil texture look for the border. Border-image made this incredibly simple, and the only fix I had to do at the end was also set the background color of each box for browsers like Safari and Firefox.
Border-image is an essential tool in my web design kit now, but if you really want to see some insanity check out the relatively recent flex stuff! I used that on my draws page for organizing all of the thumbnails, and for the tag list on the right side of the blog. I'm still figuring out some issues I've hit with it like aligning the last row of flex items, but it is a fast and easy way to organize elements.


Post your comment!