Dev Log: Shader Follow Up
My last post went over some of my recent shader developments with displacement maps, and using gradient maps to recolor portions of the screen. I had a couple of questions of what exactly was going on behind the scenes with the render textures that I was using to tell the shader how to actually manipulate the image, so I thought I would address that now!
Here's an example image from the game with a lot of explosions going on:
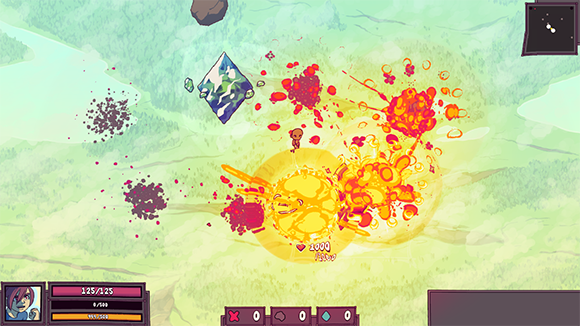
Each explosion has a shockwave ripple coming out of it which distorts the area around it. The explosion also changes the color of the screen around to a gradient map with pink and yellow. This makes it look like an intense heat, or something.
For reference, here's the shader again (it's been slightly modified since yesterday.)
From this point on there's going to be a lot of images and some hefty animated gifs, so I'll hide the rest of this post behind the read more button!
Now here's what the displacement map actually looks like:
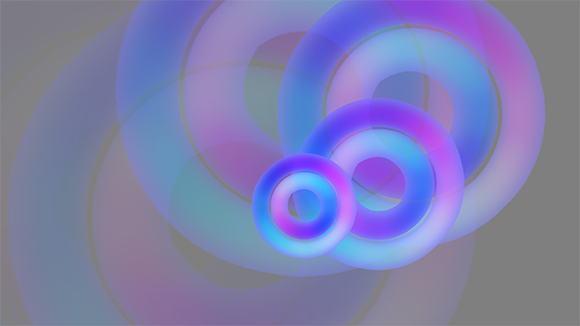
And here's the image that I'm using to get the shockwave displacement:

The displacement map is filled with gray (127, 127, 127) each frame, and then that shockwave image is rendered to it, much like how each frame for the game window is cleared and then rendered to with many different graphics. After the displacement map has been rendered to, I pass its texture to the shader to use for the displacement.
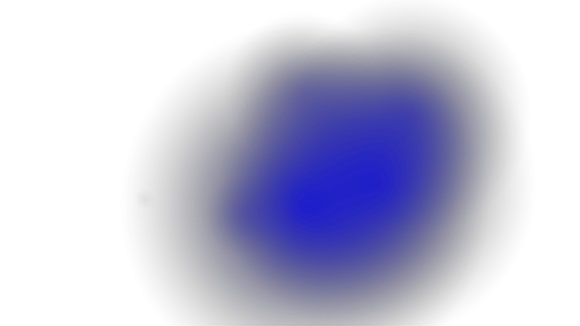
The gradient mapping is a little simpler. The explosions just render a blue glow to the surface that determines how to remap the colors. Here's how that looks behind the scenes:
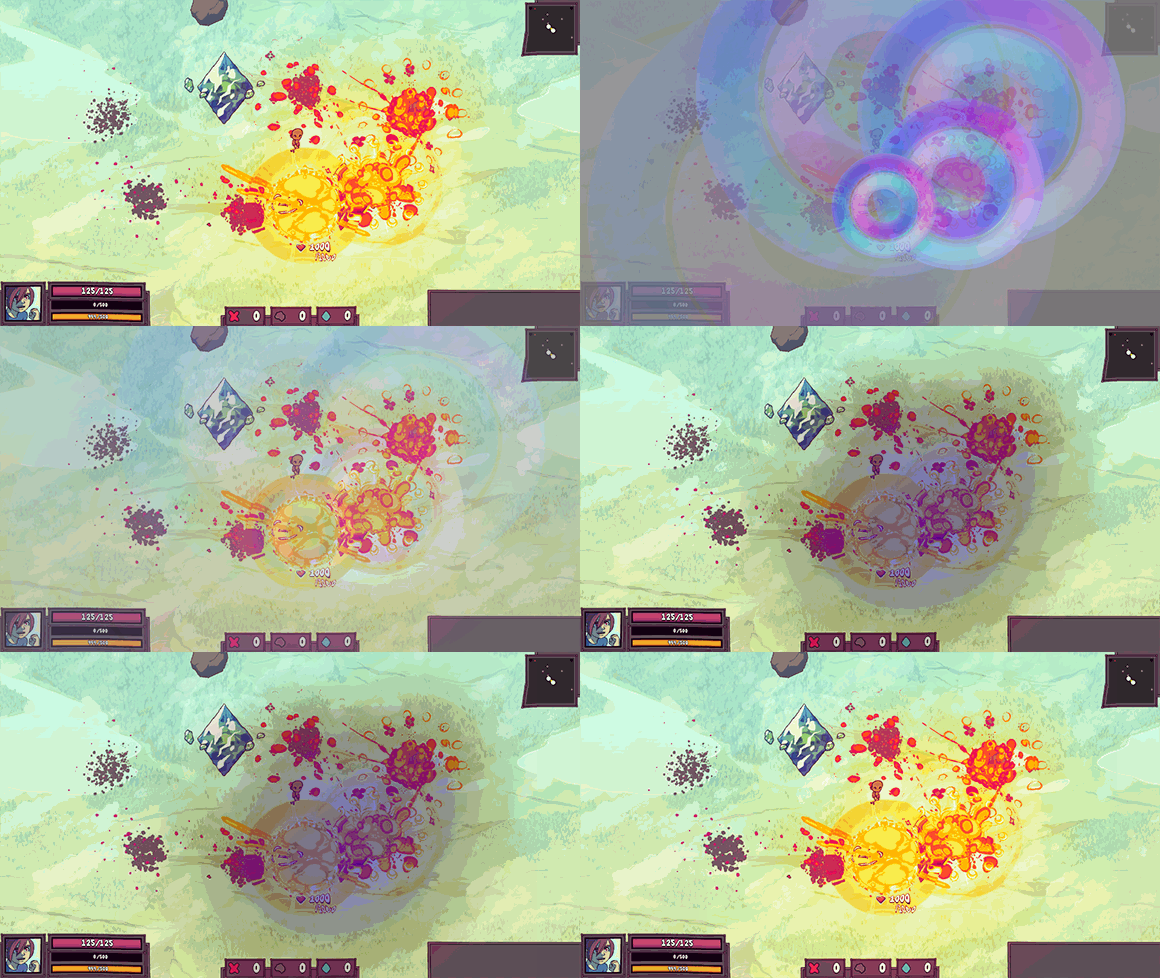
And now when it all comes together!
And of course here's a quick look at the shock wave animating:
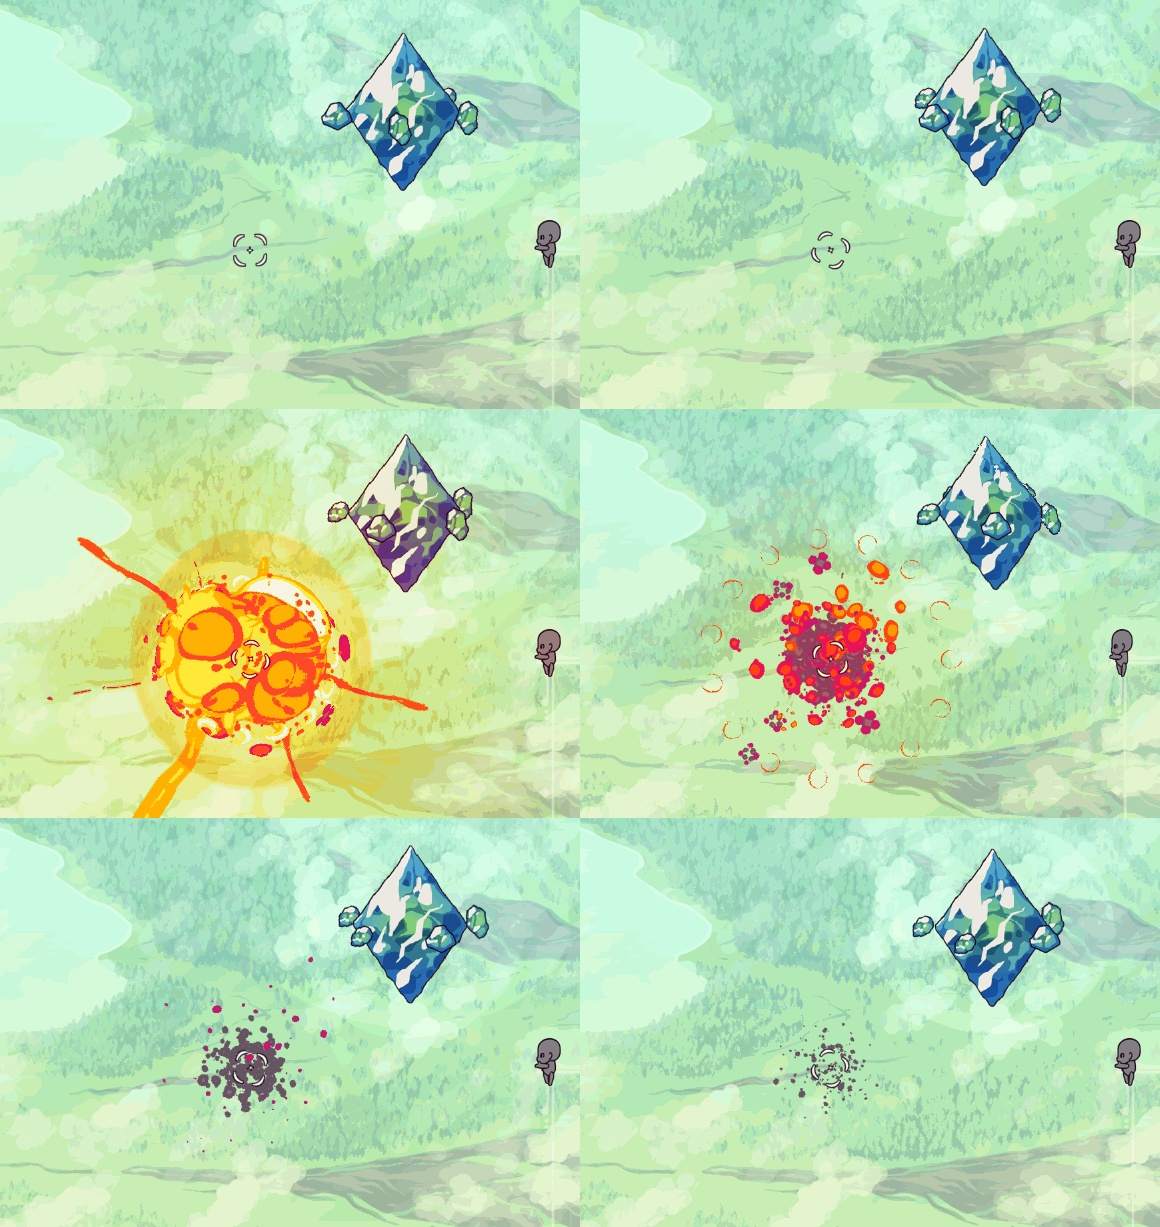
Here's an example image from the game with a lot of explosions going on:

Each explosion has a shockwave ripple coming out of it which distorts the area around it. The explosion also changes the color of the screen around to a gradient map with pink and yellow. This makes it look like an intense heat, or something.
For reference, here's the shader again (it's been slightly modified since yesterday.)
uniform sampler2D texture;

uniform sampler2D displacementMap;

uniform sampler2D paletteMap;

uniform sampler2D gradientMap;


void main() {

	// Get the pixels off of the maps.

	vec4 displacementPixel = texture2D(displacementMap, gl_TexCoord[0]);

	vec4 palettePixel = texture2D(paletteMap, gl_TexCoord[0]);


	// Read the pixel from the displaced position.

	vec2 pos = gl_TexCoord[0];

	pos.x += (displacementPixel.r * 2.0 - 1.0) * 0.025;

	pos.y -= (displacementPixel.g * 2.0 - 1.0) * 0.025;


	// Get the displaced pixel.

	vec4 pixel = texture2D(texture, pos);


	// Proper grayscale conversion.

	float gray = dot(pixel.rgb, vec3(0.299, 0.587, 0.114));


	// Get the color from the gradient.

	float gradientPos = mod(gray + palettePixel.g, 1);


	// Get the actual color from the gradient.

	vec4 gradientMapPixel = texture2D(gradientMap, new vec2(gradientPos, palettePixel.r));


	// Mix the gradient with the pixel color based on the palette pixel.

	pixel = mix(pixel, gradientMapPixel, palettePixel.a);


	// Apply the final color multiplied by the gl color.

	gl_FragColor = pixel * gl_Color;

}
Now here's what the displacement map actually looks like:

And here's the image that I'm using to get the shockwave displacement:

The displacement map is filled with gray (127, 127, 127) each frame, and then that shockwave image is rendered to it, much like how each frame for the game window is cleared and then rendered to with many different graphics. After the displacement map has been rendered to, I pass its texture to the shader to use for the displacement.
The gradient mapping is a little simpler. The explosions just render a blue glow to the surface that determines how to remap the colors. Here's how that looks behind the scenes:

And now when it all comes together!

And of course here's a quick look at the shock wave animating:





Comments
I'm amazed at what you can do with shaders, really. That effect is so powerful, and with a really small ammount of code.
I can't wait to experiment with shaders as well, cause that looks fantastic.
Thanks for sharing this insightful post, great job! Can't wait to play with your game :)
I wanted to play around with that shader a little bit, so I ported it over to HLSL. I found that the line where you mod the u pos to get the gradientPos was creating artifacts, because it causes the u value to jump to 0 when reaching 1 (which results in jumping from an onscreen white to black on the gradient map). When I removed the line the effect was working a lot better.
Is it cool if I steal the idea with the gradient map for my own projects? :D
Feel free to "steal" the technique! I posted it so that hopefully people would use it on their own stuff ;)
In the vertex function?
I believe the gradient/palette maps are more for the explosion effects and not the shockwave? I'm using the displacement normal image and I've been looking at this shader code, but I need some blanks filled in.
How do you animate the shockwave? I can easily figure out how to map the displacement into my image but I need to animate its movement. Normally this is done in shaders with time values, but none are present in your post.
Also if the palette image is needed for the shockwave, can you provide it?
Thanks!
@Jamius: Everything is done on the pixel/fragment shader here. The pixels are just pushed around by the map to look like its being enlarged.
@Mike: With my engine I render things like the shockwave on a render texture. They animate through just their scale increasing over time, and they behave just like any other object in my game engine, the only difference is that the end up on a render texture that I then use for the shader input.
For the gradient map, I don't have the image on hand at the moment, but it's just a horizontal image with a gradient from left to right. If you have Photoshop, it looks just like one of the gradients you can find when you're doing a gradient map in there.
Hope that makes sense!
Post your comment!