I moved to a new URL! Check it out!

posts tagged with: programming

Dev Log: To Batch or not to Batch

Dev Log: To Batch or not to Batch
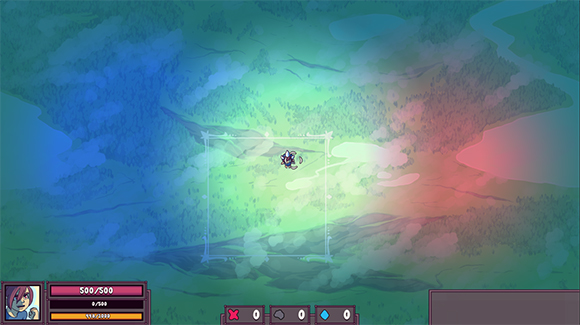
One of the things gnawing at me over the past few months is the rendering performance of Otter. So far it hasn't really been a problem, but I've only made a couple of low resolution prototypes and a game jam game with it so far. For my current project, a 1920 x 1080 resolution game, I started to worry about the rendering time as I add more and more assets to it.

So I was thinking "Hey maybe I can add some kinda sprite batching to Otter like XNA or Monogame has!" The basic concept is that it is very expensive to switch textures when rendering things with a GPU, so you take a bunch of sprites that all share the same texture and try to mash them together into one draw call from the video card. This way you can render all your sprites but you don't have to switch textures for every single one of them.

To start on this I basically tore down a bunch of rendering code in Otter. This was a few days ago, and since then I do have some sort of basic sprite batch working. In a little example I have 1000 sprites rendering with the same texture and as far as the video card knows it's actually only 2 renders... but so far I actually don't think this has affected performance at all!

I'm using SFML.Net for the core rendering of Otter. Everything that goes to the video card to show up on the screen goes through SFML's Draw functions. So far according to my small tests it seems that the video card isn't really having any issue switching textures a thousand times, but something before that is actually causing the slow down.

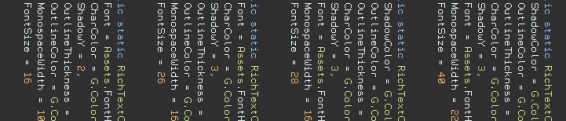
It seems that just going through and appending vertices to a vertex array in SFML.Net is just really slow. For example Otter's RichText class suffers from a pretty big performance hit if it's used to render a lot of text, like enough letters to cover the entire screen. This is pretty odd since RichText.cs in Otter is pretty much a copy of SFML's own text class from the C++ source! Almost the same code in C# runs almost 10x slower than C++, and of course this is not a big surprise since C# has a bunch of extra stuff with the managed memory and garbage collection. Still, it is pretty discouraging to realize. (Another tough one is the Tilemap class, which will suffer from big slow down during real time modification of a huge tilemap due to the rebuilding of the VertexArray!)

So right now I'm still reorganizing a bunch of code in Otter's rendering stuff. Hopefully the API will remain mostly unchanged, but right now my hope is that using texture atlases in Otter becomes smoother and actually has a performance benefit. Yay programming.

Dev Log: Using Config Objects

Dev Log: Using Config Objects
One of the recent changes in Otter is the ability to configure the RichText object with a RichTextConfig object. This was inspired by something I saw some friends of mine doing in their project. Instead of having a long drawn out list of possible parameters for the creation of an object, instead you can pass in a config object that has all of those parameters set. Here's a quick example.
//In a static class that holds all the Config objects
public static RichTextConfig RTSkyCellStat = new RichTextConfig() {
ShadowColor = G.Colors.Dark,
OutlineColor = G.Colors.Dark,
OutlineThickness = 3,
CharColor = G.Colors.Light,
ShadowY = 3,
Font = Assets.FontHud,
MonospaceWidth = 16,
FontSize = 28
};

And creating the RichText object with this looks like this:
public RichText TextHealth = new RichText("600", Config.RTSkyCellStat);

One of the coolest things about using a Config object is that one Config object can be used for a bunch of different RichText objects. This means that I can define common styles of RichText in a static class somewhere and reuse them as much as I want, so if I need to change something across all of those RichText objects all I need to do is change the config.

I'm not sure if this is the best method of doing this in C# land but so far it seems to be working pretty well. I'm also using Configs for a lot of my UI elements as it lets me define a couple of different styles for panels and buttons and reuse them for elements that share similar roles.

Dev Log: Enemy Waves

Dev Log: Enemy Waves
Waves of enemies can be a pretty confusing thing to manage. It sounds simple at first, but the amount of ways that you can manage a group of enemies entering the game seems nearly endless. Usually in games where I have waves of enemies I don't have enough time to think of an elegant solution. I just usually end up with some sort of random enemy generator and over time I add more potential enemy types to the pool. This works most of the time but can often lead to really weird patterns, or nearly impossible to survive scenarios if its not tuned correctly.

For this game I have a little bit more time than a weekend to complete it, so this gives me an opportunity to try and come up with a cool solution. For the current design of the game there exist enemy spawner tiles in the game world. These tiles are present from the very start of the session, although all of them might not be active yet.

Enemies can spawn from any one of the active tiles in the scene. There is always at least one active enemy spawner from the start. An enemy wave consists of a list of enemies, and each one of those list entries also knows what enemy spawner they should come from, and how long they should wait before appearing.

When I have a wave ready to go I can add it into my EncounterManager object which will then execute each wave. An enemy wave can either wait for a certain amount of time before spawning the next one, or it can wait for all of the enemies to be cleared before spawning the next one.

So with all of that, this is what it currently looks like to set up enemy waves:
var wave2 = new EnemyWaveProperties()
.Add(typeof(EnemyBitty))
.SpawnFrom(1)
.Add(typeof(EnemyBitty))
.SpawnFrom(0)
.Delay(120)
.Add(typeof(EnemyPopcorn))
.SpawnFrom(1)
.Add(typeof(EnemyPopcorn))
.Delay(120)
.SpawnFrom(0)
.Add(typeof(EnemyBitty))
.Add(typeof(EnemyBitty));

EncounterManager.AddAction(new EncounterActionEnemyWave(wave2));
And here's a quick look at what it looks like when the encounter manager is executing an enemy wave action.
public override void Execute() {
foreach(var wave in properties.Waves) {
var spawner = EnemySpawner.GetSpawnerById(wave.SpawnerId);

foreach (var waveEnemy in wave.Enemies) {
if (Spawning) {
if (Timer == waveEnemy.SpawnDelay) {
var enemy = spawner.Spawn(waveEnemy.EnemyType);
EnemiesSpawned.Add(enemy);
SpawnedFirstEnemy = true;
}
}
}
}

if (Timer >= properties.MaxSpawnDelay) {
Spawning = false;
}

if (WaitForClear && SpawnedFirstEnemy) {
var enemiesDead = true;
foreach (var enemy in EnemiesSpawned) {
if (enemy.IsInScene) { // Enemy is still alive
enemiesDead = false;
}
}
if (enemiesDead) {
Finished = true;
EnemiesSpawned.Clear();
}
}
else {
if (Timer >= Time) {
Finished = true;
}
}

Timer++;
}
Nothing too crazy, I think!

Dev Log: Impact Effects

Dev Log: Impact Effects
Whoops, been kinda neglecting my poor blog for a week. I've been making some progress on my fancy game project though! Just have been forgetting to post about it.

Image


One of the things I tackled over the last couple of days was adding more visual effects for stuff like damage impacts. I want damage to feel over the top juicy at all times so that every impact is really felt by the player. The effect I ended up with for damage impacts is an inverted flash combined with some red colored mixing and additive blending.

Image


Right now I'm using one utility shader that has a bunch of parameters on it for various effects. Check it out:
#version 120
uniform sampler2D texture;
uniform sampler2D noiseTexture;
uniform vec4 overlayColor;
uniform vec4 additiveColor;
uniform vec4 subtractiveColor;
uniform float overlayNoise;
uniform float inverted;
uniform float noiseX;
uniform float noiseY;

void main() {
//get color of this pixel
vec2 pixpos = gl_TexCoord[0].xy;
vec4 pixcol = texture2D(texture, pixpos);

vec4 outcol = abs(inverted-pixcol);
outcol.a = pixcol.a;

//mix in the overlay color
outcol = mix(outcol, overlayColor, overlayColor.a);

//add the additive color
outcol += additiveColor * additiveColor.a;

//subtract the subtractive color (DUH)
outcol -= subtractiveColor;

vec4 noiseColor = texture2D(noiseTexture, mod(pixpos, 1) + vec2(noiseX, noiseY));
outcol = mix(outcol, noiseColor, overlayNoise);

//reset alpha to prevent coloring transparent pixels
outcol.a = pixcol.a;

//output the final color
gl_FragColor = outcol;
}
I'm still learning the ins and outs of shaders so this probably isn't the best way to do this, but for now it seems to be working out fine.

Along with this shader there is some code in my "Combatant" component to control the shader. The Combatant has a timer that is set whenever it takes damage. This timer is then used to control various parameters on the shader. Every 2 frames the image is inverted using the shader. When the image is inverted there's a red additive color blend applied to the image, and when the image is not inverted there is a normal red color mix applied. The intensity of the color mix is determined by the timer. It starts very intense then fades away.

On top of that another texture is blended with the image. The other texture is just a simple image of generated noise. I'm not totally sure why, but for some reason I like the noise texture along with the rest of the effects. It kind of represents a disruption to the target taking damage, or something poetic like that.

Last but not least the image also shakes around a bit. This is something I first noticed a lot while playing Street Fighter 4. An action freeze along with sprite shaking is an incredibly useful way to convey an intense impact.

Here's the little blurb of code that handles the effects for Combatants
//Handle graphics
foreach (var img in Images) {
var overlay = Util.ScaleClamp(StunEffect, 0, StunEffectMax, 0, 0.5f);
var color = new Color(Color.Black) { A = overlay };
var addColor = new Color(StunColor) { A = overlay };

img.Shader.SetParameter("overlayNoise", overlay * 0.5f);
img.Shader.SetParameter("noiseX", Rand.Float(0, 0.25f));
img.Shader.SetParameter("noiseY", Rand.Float(0, 0.25f));

if (StunEffect > StunEffectMax * 0.25f) {
addColor.A = 0.5f;
color = G.Colors.Dark;
color.A = 0.25f;
img.Shader.SetParameter("inverted", StunEffect % 4 > 1 ? 1 : 0);
}
else {
img.Shader.SetParameter("inverted", 0);
}

img.Shader.SetParameter("overlayColor", color);
img.Shader.SetParameter("additiveColor", addColor);

img.Shake = Util.ScaleClamp(StunEffect, 0, StunEffectMax, 0, 30);
}
Along with the impact effects the Bullet entities have an impact effect to help show damage. If bullets hit something and deal damage they spawn a small red and yellow explosion, and if they don't do damage then the particle is blue and cyan. This is something I saw when I played a lot of Thunder Force III as a kid!

Dev Log: Quick Lighting Test

Dev Log: Quick Lighting Test
As a quick experiment I wanted to see how Otter would be equipped to handle a simple lighting set up. The basic set up is just a big render texture that is filled with a dark color with a blend mode set to multiply. Then light is rendered to the render texture with a blend mode of additive. The result is a layer of shadow that can have light rendered to it.

Image


The code for this set up right now is pretty straight forward as well. I'm using a black and white image for the light. Just a black rectangle with a white radial gradient in the center.

Here's some sample code to show how this effect is achieved with Otter!
//set up the surface
public Surface SurfaceLighting = new Surface(Game.Instance.Width, Game.Instance.Height, new Color("379")) {
Blend = BlendMode.Multiply
};

//set up the light
public Image ImageLight = new Image(Assets.ImageLight1) {
Blend = BlendMode.Add
};

//add the surface to an entity to render it
//this happens in an object's initialization
AddGraphicGUI(SurfaceLighting);

//render light to the surface
//this happens in a Render() function
Draw.SetTarget(SurfaceLighting);
ImageLight.Color = Color.White;
Draw.Graphic(ImageLight, Input.MouseX, Input.MouseY);
ImageLight.Color = Color.Red;
Draw.Graphic(ImageLight, Input.MouseX + 500, Input.MouseY);
ImageLight.Color = Color.Blue;
Draw.Graphic(ImageLight, Input.MouseX - 500, Input.MouseY);
Draw.ResetTarget();

Dev Log: Pathfinding Fun

Image


Like a cat chasing a laser pointer, I have some basic enemies chasing paths through the skies.

Right now I'm using A* and although I don't really know what is going on that much, I have a system that enemies can use to find paths to their destinations. Normally I wouldn't bother with any sort of path finding, but for this game I want enemies to have to intelligently navigate through obstacles that the player is deploying, so my usual "make up a path finding function that doesn't actually path find but sometimes works out" function wont cut it.

What I have currently is a pretty straight forward set up:
- One PathFinder instance in my Scene. It extends Entity so that it can be updated by the scene automatically.
- Enemies request a path from PathFinder and also register a callback Action with the request.
- The PathFinder instance adds the request to the queue.
- Every update the PathFinder will take the top item of the queue and start the path finding process.
- The actual A* algorithm and calculations are run on a BackgroundThread so that the game can continue while this is going on.
- When the path is done calculating the callback is fired, and the enemy now knows about its path.
- It chases down the nodes that were added to its path.

I made a quick change to the A* algorithm as well under the sage advice of Chevy Ray: I'm using a maximum movement value that will stop the algorithm if the move costs become too high. The result is that the algorithm will return a partial path to the final target instead of the entire path (which could take a long time to calculate in a set of nodes with a lot of open spaces.) So with this in mind the rest of my logic looks like this:

- When the enemy reaches the last node, it checks to see if its close to its intended target.
- If not it requests a new path to its target.
- If it is then it will enter its attack behavior, whatever that is.

So far this seems to be working out pretty well. I have a lot of work to do with how enemies will end up treating their path nodes in regards to their actual movement. Right now they just try to move toward each node, but with a lot of nodes together they end up having some trouble, like that wiggling in the animation above. Something like an averaged out path between a lot of nodes might work better... hmm!