


Visual Studio and Itch.io Refinery
Itch.io just released their brand new Refinery tools to the public and I immediately jumped into them head first. After just a little bit of set up I was able to get their new magic up and running for Super Sky Sisters. I have a set up now in Visual Studio in which I can select "Itch" as my build target and push F6 to build and deploy the game to my beta testers on Itch.
So using Visual Studio 2013 (and probably other versions can do this as well) here's how to set up your game to publish on Itch with just the push of a button!
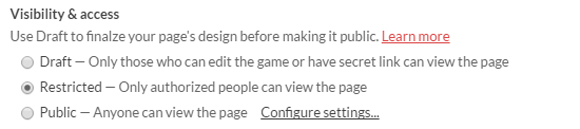
The first thing you'll need is your game details set up correctly on Itch. This example is treating this as a closed beta, but you could do this for any sort of configuration. To restrict access of your game to just your beta testers you want to choose Restricted for the Visibility & Access section.
For the case of a closed beta you can grant access via the Download Keys section in the Distribute tab.
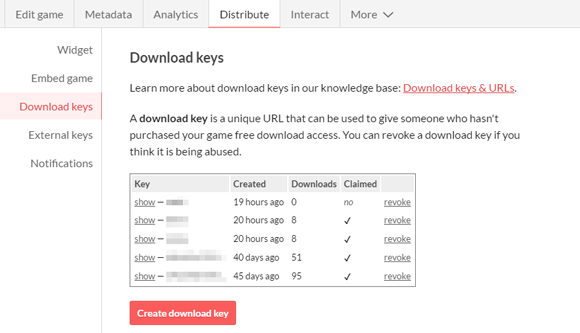
Users that have keys can view the Restricted game as if it were publicly listed.
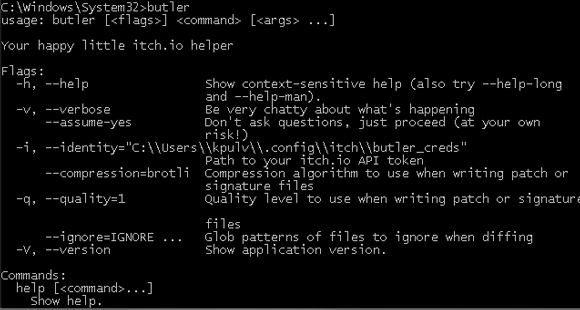
Now it's time to start pushing builds to your game. To do this you're going to use Butler which is a command line tool that can interact with Itch. The set up instructions for Butler are located on the Itch website and are pretty thorough so I won't bother repeating all of the set up info here.
The one thing I will note is that adding Butler to your PATH in Windows is super useful. Being able to just call upon butler from the command line without having to navigate through folders upon folders is going to save some headaches later. Further information on how to do that can be found here. You basically just want to add whatever folder butler.exe resides in to your PATH data in Windows. This will let you call butler from the command line from anywhere.
Pushing your game to Itch is all covered in their instructions here, so I won't go into too much detail here. The main focus of this is how to get this hooked up with Visual Studio.
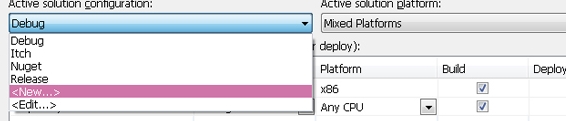
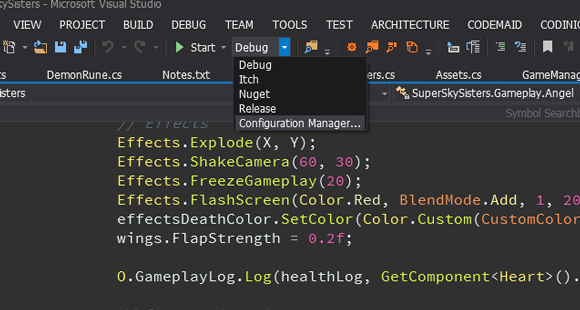
First you're going to want to create a new build configuration. In the drop down that gives you Debug or Release you can choose to open the Configuration Manager.
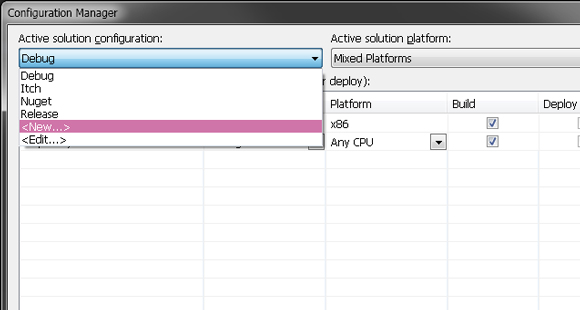
In the Configuration Manager select the Active solution configuration and choose <New...>
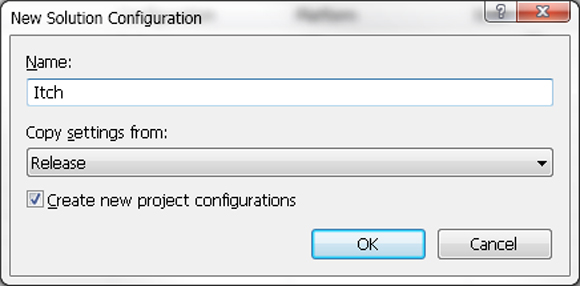
You can then make a new configuration named Itch, and copy your settings from "Release" so you don't end up pushing out slow and clunky debug builds.
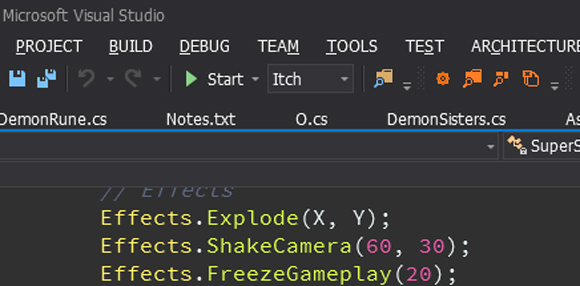
You can now select "Itch" from the dropdown menu that gives you Debug or Release.
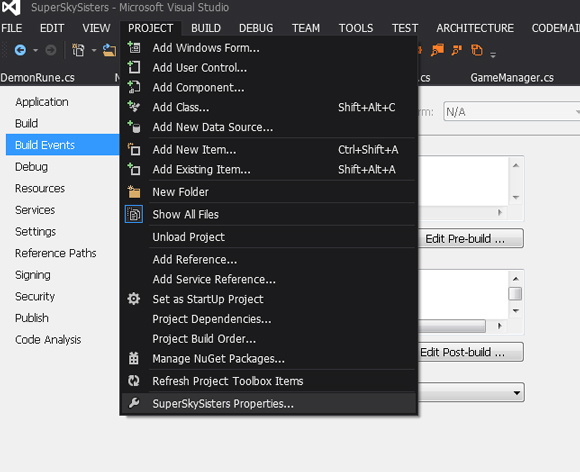
Now for some Project Properties changes. Open the Project Properties by going to the Project menu and selecting "YourProjectName Properties..." at the bottom of the dropdown.
Head on over to the Build tab and make sure you have your Itch configuration selected.
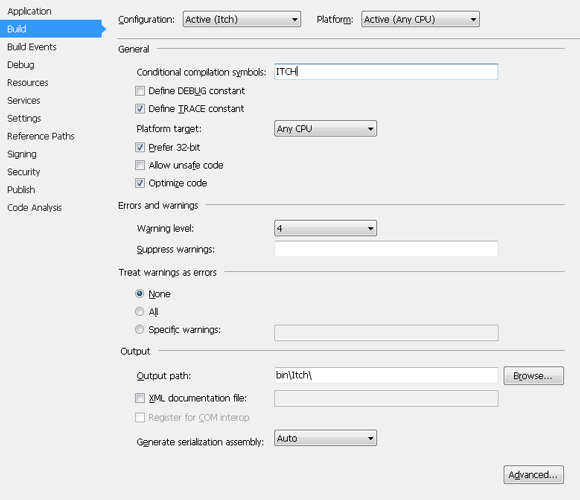
Note the Configuration "Active (Itch)" or "Itch" is fine for this drop down. Also note the "Conditional compilation symbols:" set to "ITCH" This allows you to do things like "#if ITCH" in your code. Also note the "Output path:" set to "bin\Itch\" by default. We'll be using this in a second.
Head on over to Build Events and this is where the magic is going to happen.
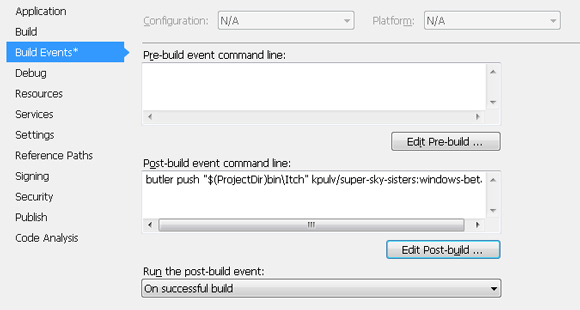
Click the "Edit Post-build..." to see a slightly better view of the post build event command line data. Here is where the call to the magnificent butler will go.
Oops! I actually discovered that the post build commands will run from any build configuration! That really stinks, so this isn't as smooth as I initially thought. You can add a condition using your $(ConfigurationName) to get around this:
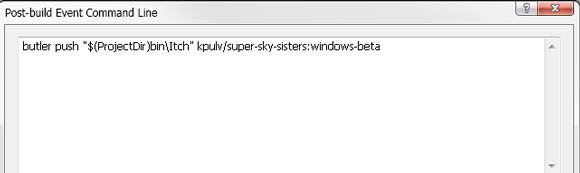
The magic code for Super Sky Sisters is shown above. From the instructions of Butler you can see that it will push the directory "$(ProjectDir)bin\Itch" to Super Sky Sisters under the "windows-beta" branch. For your game it will be different, but the key thing here is the directory that is being pushed. "$(ProjectDir)bin\Itch" will grab the folder that Visual Studio dumps the built project into after it is done building. Once it's done building then it will kick off the post-build event which will trigger Butler to upload the data.
So to give this a spin all you have to do is save out your project properties and then select your Itch build configuration and push F6. It might take a little while to upload your data to Itch's servers to make sure not to try to build multiple times quickly. Visual Studio will probably prevent you from doing so anyway. You can see how things are going with the Output tab on the bottom of your code window.
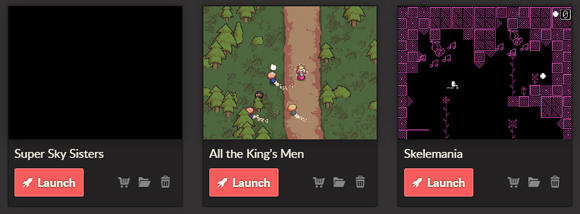
Now if you're using the Itch.io App then you'll be able to easily get the latest build straight from their servers.
After all that you should be good to go. Have fun with your new magical way of just pushing F6 to have your game appear on the internet!
So using Visual Studio 2013 (and probably other versions can do this as well) here's how to set up your game to publish on Itch with just the push of a button!
Itch Game Setup
The first thing you'll need is your game details set up correctly on Itch. This example is treating this as a closed beta, but you could do this for any sort of configuration. To restrict access of your game to just your beta testers you want to choose Restricted for the Visibility & Access section.
For the case of a closed beta you can grant access via the Download Keys section in the Distribute tab.
Users that have keys can view the Restricted game as if it were publicly listed.
Butler
Now it's time to start pushing builds to your game. To do this you're going to use Butler which is a command line tool that can interact with Itch. The set up instructions for Butler are located on the Itch website and are pretty thorough so I won't bother repeating all of the set up info here.
The one thing I will note is that adding Butler to your PATH in Windows is super useful. Being able to just call upon butler from the command line without having to navigate through folders upon folders is going to save some headaches later. Further information on how to do that can be found here. You basically just want to add whatever folder butler.exe resides in to your PATH data in Windows. This will let you call butler from the command line from anywhere.
Pushing your game to Itch is all covered in their instructions here, so I won't go into too much detail here. The main focus of this is how to get this hooked up with Visual Studio.
Visual Studio
First you're going to want to create a new build configuration. In the drop down that gives you Debug or Release you can choose to open the Configuration Manager.
In the Configuration Manager select the Active solution configuration and choose <New...>
You can then make a new configuration named Itch, and copy your settings from "Release" so you don't end up pushing out slow and clunky debug builds.
You can now select "Itch" from the dropdown menu that gives you Debug or Release.
Now for some Project Properties changes. Open the Project Properties by going to the Project menu and selecting "YourProjectName Properties..." at the bottom of the dropdown.
Head on over to the Build tab and make sure you have your Itch configuration selected.
Note the Configuration "Active (Itch)" or "Itch" is fine for this drop down. Also note the "Conditional compilation symbols:" set to "ITCH" This allows you to do things like "#if ITCH" in your code. Also note the "Output path:" set to "bin\Itch\" by default. We'll be using this in a second.
Head on over to Build Events and this is where the magic is going to happen.
Click the "Edit Post-build..." to see a slightly better view of the post build event command line data. Here is where the call to the magnificent butler will go.
Oops! I actually discovered that the post build commands will run from any build configuration! That really stinks, so this isn't as smooth as I initially thought. You can add a condition using your $(ConfigurationName) to get around this:
if $(ConfigurationName) == Itch (

  butler push "$(ProjectDir)bin\Itch" kpulv/super-sky-sisters:windows-beta

)
So to give this a spin all you have to do is save out your project properties and then select your Itch build configuration and push F6. It might take a little while to upload your data to Itch's servers to make sure not to try to build multiple times quickly. Visual Studio will probably prevent you from doing so anyway. You can see how things are going with the Output tab on the bottom of your code window.
Now if you're using the Itch.io App then you'll be able to easily get the latest build straight from their servers.
After all that you should be good to go. Have fun with your new magical way of just pushing F6 to have your game appear on the internet!


Comments
Post your comment!