


Game Jam Procedural Generation Part II
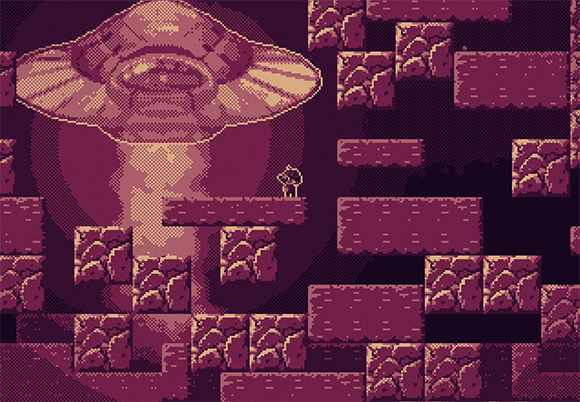
In the last episode of Game Jam Procedural Generation I talked about the "outer layer" of my procedural generation code for my yet to be released game jam game. After the outer layer of stuff has been generated, that can be used to inform the "inner layer" of the procedural generation. So the outer layer in this case is the galaxy that the player can explore in their ship, and the inner layer is the actual side scrolling platformer level that they will explore.
Where do we even begin? First keep in mind that I'm using Otter for all of this stuff, so if you see functions and code that looks totally unfamiliar, it's probably an Otter thing. Also keep in mind that all of this code was written during a 48 hour game jam, so it ain't pretty. I'm just going to be sharing big snippets of code and hopefully try to explain what is happening in each one.
In the last step I talked about how I create a config object to hold all of the possible fields that will be used to generate the level. Here's what that looks like:
Pretty straight forward. Just a simple class that will hold a bunch of values that can be then passed to the classes that generate the platforming level.
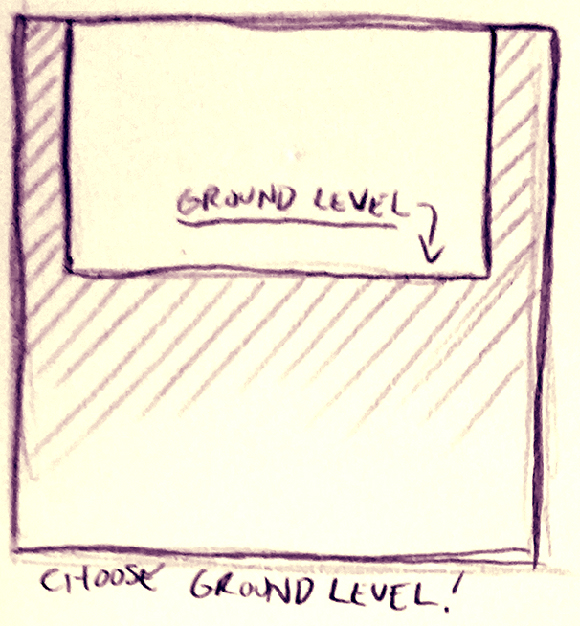
The first thing that I do in the levels is figure out what the ground level is. The ground level represents the Y position in the level where the ground will start. Everywhere above the ground level will be empty space, everything below the ground level will be solid ground.
The ground level is determined by the ground level offset value in the config object that was passed to the generation class. The class mainly uses two GridCollider objects: grid, and gridDark, to keep track of the collidable area that makes up the level. Eventually grid will be used to generate the tile map, and gridDark will be used to create the background tile map.
The first thing that happens is that the grid and gridDark are cleared with the true flag. This means the entire grid will be filled in as solid. Once the ground level is known, all tiles in the grid above the ground level are set to false, meaning that they are empty again.
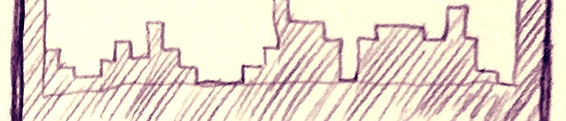
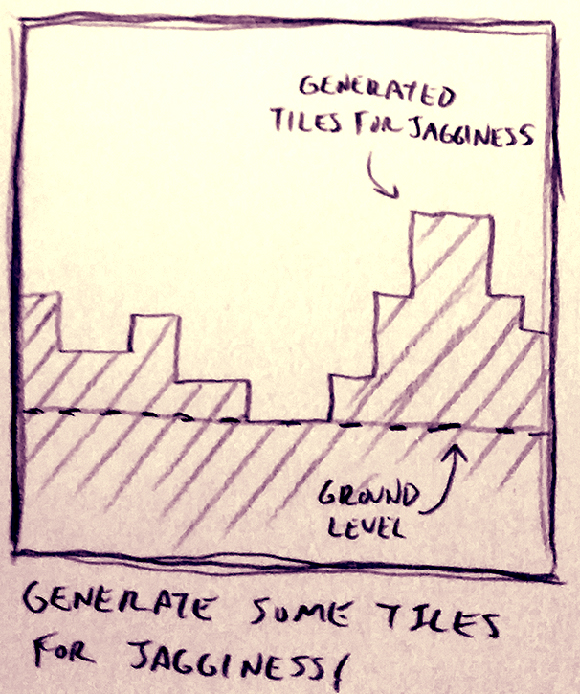
Next up is generating the terrain across the top of the ground. This is where the Jagginess field from the config file will come into play. Basically the higher the jagginess value, the more variation there will be along the ground of the planet. That looks like this:
This code will move from left to right across the entire level stepping one tile at a time. Each time it steps one tile, it figures out if it can change the height of the ground for that particular horizontal tile. If it can, it will change anywhere between up 3 tiles, to down 3 tiles. Therefore if the jagginess value is high, it will be changing height a lot more often, which results in a jagged looking surface.
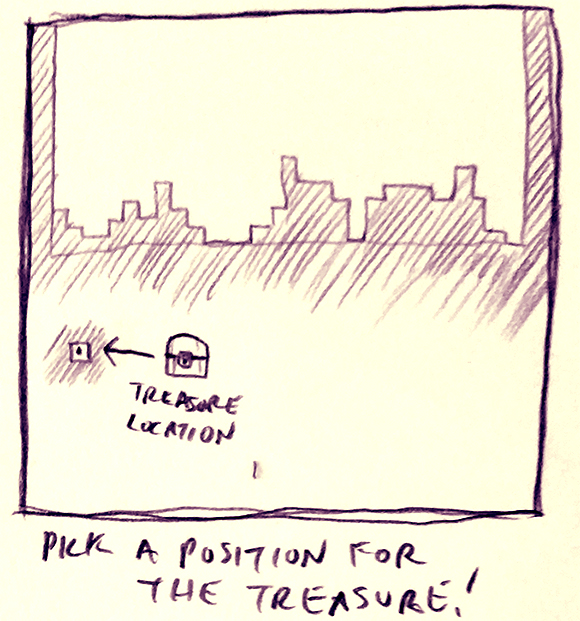
The next step is to determine where the treasure will be in the level. The treasure can be placed on the left or right side of the level, and it can be placed at any height in the level. Here's the code for that:
This might look a little confusing because there's a lot of math going on to make sure the treasure is being placed on a position aligned with the grid, but it's not as complicated as it looks. All that's happening is the treasure is being placed on the left or right of the level, and then it's placed somewhere on the Y axis with a min and max boundary. After that the X and Y of the treasure is placed on the grid. As a final check, the treasureX value is clamped slightly away from the left and right edges of the screen to make sure it's not too far out into the edge of the level. The final step is adding it to the scene.
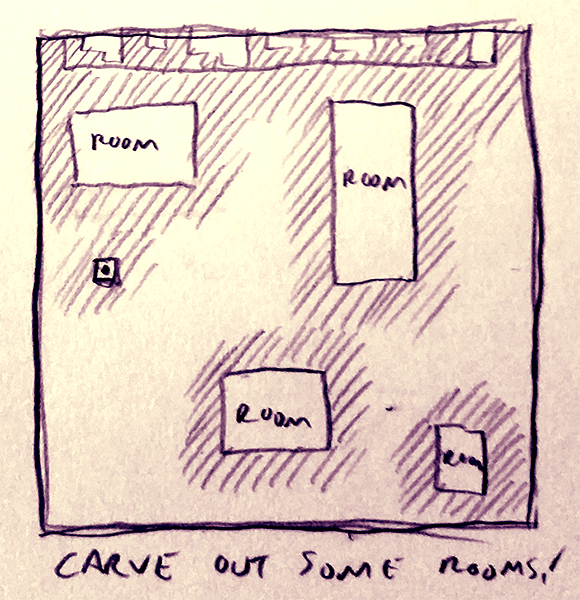
Next up is room generation. Rooms are just rectangular areas in the level that are hallowed out. Rooms are all placed underground by using the groundLevel value to determine how high they can possibly be in the level. Also another thing to note that this code does not check for overlapping rooms. A lot of procedural games with rooms will check to see if rooms are overlapping other rooms, but I only had 48 hours for this jam so I didn't bother with that. The code to generate the rooms looks like this:
The number of rooms is determined by the field in the config that was passed to the generation class. Then in a loop the rooms will be generated and added to a list of rooms. Each room randomly decides its width and height, and then position. The main grid will also be cleared for each area of the rooms at this moment. The reason that the rooms are added to a list is so that I can reference them later for tunnel digging.
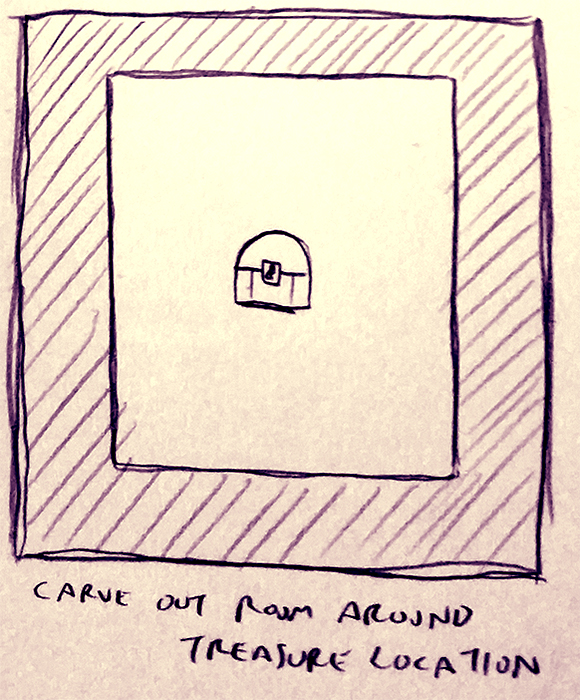
The last thing here is placing a room for the treasure. Earlier I figured out where the treasure was going to be, but I also need to make sure there is empty space around the treasure so that the player can actually get to it.
I add a room to the list of rooms that is a 7 x 7 room that will have the treasure exactly in the center. Much later in the generation I'll be digging out that room.
This is getting a little long so I'll cut it off here for now. Part III will continue on with the level generation!
Where do we even begin? First keep in mind that I'm using Otter for all of this stuff, so if you see functions and code that looks totally unfamiliar, it's probably an Otter thing. Also keep in mind that all of this code was written during a 48 hour game jam, so it ain't pretty. I'm just going to be sharing big snippets of code and hopefully try to explain what is happening in each one.
In the last step I talked about how I create a config object to hold all of the possible fields that will be used to generate the level. Here's what that looks like:
class ScenePlatformingConfig {

    public int Width;

    public int Height;


    public int ShipStartOffset;


    public int TreasureDirection;

    public int TreasureDistanceOffset;


    public int GroundLevelOffset;


    public bool Explored;

    public bool Pillaged;


    public int Jagginess;


    public int Platforms;


    public int DecaySpots;

    public int DecayChance;


    public int IslandSpots;

    public int IslandSize;


    public int Rooms;


    public string Name;


    public int BreakableChance;


    public int CreatureChance;

}
Pretty straight forward. Just a simple class that will hold a bunch of values that can be then passed to the classes that generate the platforming level.
The first thing that I do in the levels is figure out what the ground level is. The ground level represents the Y position in the level where the ground will start. Everywhere above the ground level will be empty space, everything below the ground level will be solid ground.
int groundLevel = config.Height / 2 / 16 + config.GroundLevelOffset;


// Set the ground level

grid.Clear(true);

gridDark.Clear(true);


grid.SetRect(1, 0, grid.TileColumns - 2, grid.TileRows - 1 - groundLevel, false);

gridDark.SetRect(1, 0, grid.TileColumns - 2, grid.TileRows - 1 - groundLevel, false);
The ground level is determined by the ground level offset value in the config object that was passed to the generation class. The class mainly uses two GridCollider objects: grid, and gridDark, to keep track of the collidable area that makes up the level. Eventually grid will be used to generate the tile map, and gridDark will be used to create the background tile map.
The first thing that happens is that the grid and gridDark are cleared with the true flag. This means the entire grid will be filled in as solid. Once the ground level is known, all tiles in the grid above the ground level are set to false, meaning that they are empty again.
Next up is generating the terrain across the top of the ground. This is where the Jagginess field from the config file will come into play. Basically the higher the jagginess value, the more variation there will be along the ground of the planet. That looks like this:
// Generate terrain across the top of the ground

int heightGen = Rand.Int(10);

var jaggedChance = (int)Util.ScaleClamp(config.Jagginess, 0, 10, 10, 90);

for (var xx = 1; xx < grid.TileColumns; xx++) {

    if (Rand.Chance(jaggedChance)) {

        heightGen += Rand.Int(-3, 3);

        heightGen = (int)Util.Clamp(heightGen, 0, 15);

    }


    var yy = grid.TileRows - 1 - groundLevel - heightGen;


    grid.SetRect(xx, yy, 1, heightGen);

}
This code will move from left to right across the entire level stepping one tile at a time. Each time it steps one tile, it figures out if it can change the height of the ground for that particular horizontal tile. If it can, it will change anywhere between up 3 tiles, to down 3 tiles. Therefore if the jagginess value is high, it will be changing height a lot more often, which results in a jagged looking surface.
The next step is to determine where the treasure will be in the level. The treasure can be placed on the left or right side of the level, and it can be placed at any height in the level. Here's the code for that:
// place treasure

var treasureX = config.Width / 2 + config.TreasureDirection * config.Width / 2 - 64 - config.TreasureDistanceOffset * config.TreasureDirection;

var treasureY = (int)Util.Clamp(Rand.Int(config.Height), 48, config.Height - 128);

treasureX = (int)Util.SnapToGrid(treasureX, 16);

treasureY = (int)Util.SnapToGrid(treasureY, 16);


treasureX = (int)Util.Clamp(treasureX, 64, config.Width - 64);

Scene.Add(new TreasureBigOre(treasureX, treasureY));
This might look a little confusing because there's a lot of math going on to make sure the treasure is being placed on a position aligned with the grid, but it's not as complicated as it looks. All that's happening is the treasure is being placed on the left or right of the level, and then it's placed somewhere on the Y axis with a min and max boundary. After that the X and Y of the treasure is placed on the grid. As a final check, the treasureX value is clamped slightly away from the left and right edges of the screen to make sure it's not too far out into the edge of the level. The final step is adding it to the scene.
Next up is room generation. Rooms are just rectangular areas in the level that are hallowed out. Rooms are all placed underground by using the groundLevel value to determine how high they can possibly be in the level. Also another thing to note that this code does not check for overlapping rooms. A lot of procedural games with rooms will check to see if rooms are overlapping other rooms, but I only had 48 hours for this jam so I didn't bother with that. The code to generate the rooms looks like this:
// Add random rooms


int numRooms = config.Rooms;

for (var i = 0; i < numRooms; i++) {

    int roomWidth = Rand.Int(3, 10);

    int roomHeight = 13 - roomWidth;


    int x = Rand.Int(1, grid.TileColumns - roomWidth - 1);

    if (grid.TileRows - 1 - roomHeight < groundLevel + 2) continue;

    int y = Rand.Int(groundLevel + 2, grid.TileRows - 1 - roomHeight);


    var r = new Room() {

        X = x,

        Y = y,

        Width = roomWidth,

        Height = roomHeight

    };


    rooms.Add(r);


    grid.SetRect(x, y, roomWidth, roomHeight, false);

}
The number of rooms is determined by the field in the config that was passed to the generation class. Then in a loop the rooms will be generated and added to a list of rooms. Each room randomly decides its width and height, and then position. The main grid will also be cleared for each area of the rooms at this moment. The reason that the rooms are added to a list is so that I can reference them later for tunnel digging.
The last thing here is placing a room for the treasure. Earlier I figured out where the treasure was going to be, but I also need to make sure there is empty space around the treasure so that the player can actually get to it.
// save treasure coordinate


var gx = treasureX / 16;

var gy = treasureY / 16;


// Add new room for the treasure


rooms.Add(new Room() {

    X = gx - 3,

    Y = gy - 3,

    Width = 7,

    Height = 7

});
I add a room to the list of rooms that is a 7 x 7 room that will have the treasure exactly in the center. Much later in the generation I'll be digging out that room.
This is getting a little long so I'll cut it off here for now. Part III will continue on with the level generation!


Post your comment!