I moved to a new URL! Check it out!

posts dated from: april 2014

Dev Log: Boulder Juice

Image


Lately I've been getting a lot done on this game! Actually I'm not totally sure if that's true, but it feels like I've been getting a lot done. I've started to do more organized work blocks which have been working out nicely so far. (I might've mentioned this before.)

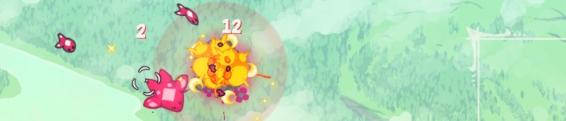
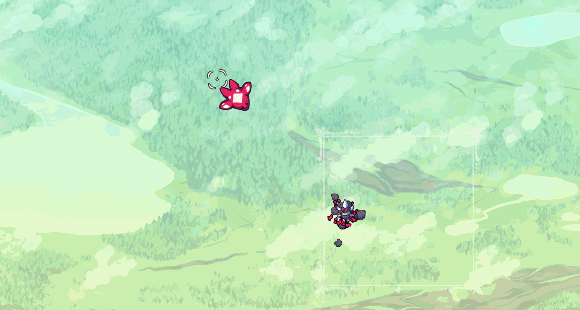
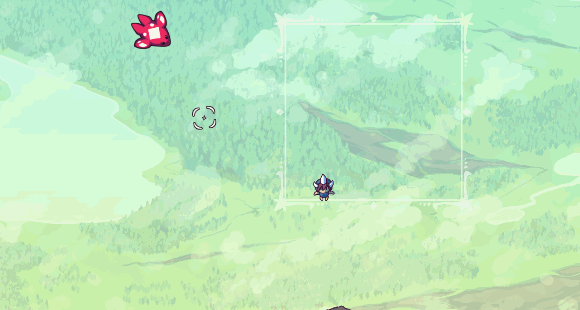
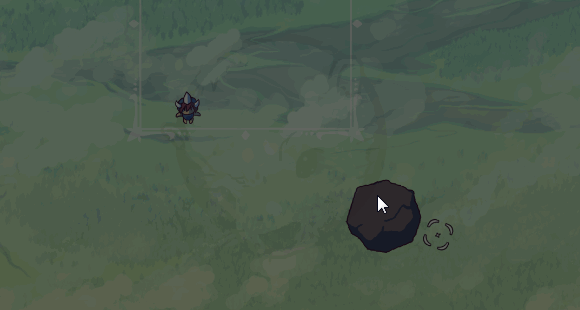
While I work away at menus and UI I took a break to work on some good ole fashioned particle effects. Right now the game has boulders that can be harvested for materials to build islands out of. No idea if this is going to be in the final game, but it's fun to blow them up!

Doodle Post

Image

Doodle Post

Image

Dev Log: Enemy Waves

Dev Log: Enemy Waves
Waves of enemies can be a pretty confusing thing to manage. It sounds simple at first, but the amount of ways that you can manage a group of enemies entering the game seems nearly endless. Usually in games where I have waves of enemies I don't have enough time to think of an elegant solution. I just usually end up with some sort of random enemy generator and over time I add more potential enemy types to the pool. This works most of the time but can often lead to really weird patterns, or nearly impossible to survive scenarios if its not tuned correctly.

For this game I have a little bit more time than a weekend to complete it, so this gives me an opportunity to try and come up with a cool solution. For the current design of the game there exist enemy spawner tiles in the game world. These tiles are present from the very start of the session, although all of them might not be active yet.

Enemies can spawn from any one of the active tiles in the scene. There is always at least one active enemy spawner from the start. An enemy wave consists of a list of enemies, and each one of those list entries also knows what enemy spawner they should come from, and how long they should wait before appearing.

When I have a wave ready to go I can add it into my EncounterManager object which will then execute each wave. An enemy wave can either wait for a certain amount of time before spawning the next one, or it can wait for all of the enemies to be cleared before spawning the next one.

So with all of that, this is what it currently looks like to set up enemy waves:
var wave2 = new EnemyWaveProperties()
.Add(typeof(EnemyBitty))
.SpawnFrom(1)
.Add(typeof(EnemyBitty))
.SpawnFrom(0)
.Delay(120)
.Add(typeof(EnemyPopcorn))
.SpawnFrom(1)
.Add(typeof(EnemyPopcorn))
.Delay(120)
.SpawnFrom(0)
.Add(typeof(EnemyBitty))
.Add(typeof(EnemyBitty));

EncounterManager.AddAction(new EncounterActionEnemyWave(wave2));
And here's a quick look at what it looks like when the encounter manager is executing an enemy wave action.
public override void Execute() {
foreach(var wave in properties.Waves) {
var spawner = EnemySpawner.GetSpawnerById(wave.SpawnerId);

foreach (var waveEnemy in wave.Enemies) {
if (Spawning) {
if (Timer == waveEnemy.SpawnDelay) {
var enemy = spawner.Spawn(waveEnemy.EnemyType);
EnemiesSpawned.Add(enemy);
SpawnedFirstEnemy = true;
}
}
}
}

if (Timer >= properties.MaxSpawnDelay) {
Spawning = false;
}

if (WaitForClear && SpawnedFirstEnemy) {
var enemiesDead = true;
foreach (var enemy in EnemiesSpawned) {
if (enemy.IsInScene) { // Enemy is still alive
enemiesDead = false;
}
}
if (enemiesDead) {
Finished = true;
EnemiesSpawned.Clear();
}
}
else {
if (Timer >= Time) {
Finished = true;
}
}

Timer++;
}
Nothing too crazy, I think!

Doodle Post

Image

Dev Log: Impact Effects

Dev Log: Impact Effects
Whoops, been kinda neglecting my poor blog for a week. I've been making some progress on my fancy game project though! Just have been forgetting to post about it.

Image


One of the things I tackled over the last couple of days was adding more visual effects for stuff like damage impacts. I want damage to feel over the top juicy at all times so that every impact is really felt by the player. The effect I ended up with for damage impacts is an inverted flash combined with some red colored mixing and additive blending.

Image


Right now I'm using one utility shader that has a bunch of parameters on it for various effects. Check it out:
#version 120
uniform sampler2D texture;
uniform sampler2D noiseTexture;
uniform vec4 overlayColor;
uniform vec4 additiveColor;
uniform vec4 subtractiveColor;
uniform float overlayNoise;
uniform float inverted;
uniform float noiseX;
uniform float noiseY;

void main() {
//get color of this pixel
vec2 pixpos = gl_TexCoord[0].xy;
vec4 pixcol = texture2D(texture, pixpos);

vec4 outcol = abs(inverted-pixcol);
outcol.a = pixcol.a;

//mix in the overlay color
outcol = mix(outcol, overlayColor, overlayColor.a);

//add the additive color
outcol += additiveColor * additiveColor.a;

//subtract the subtractive color (DUH)
outcol -= subtractiveColor;

vec4 noiseColor = texture2D(noiseTexture, mod(pixpos, 1) + vec2(noiseX, noiseY));
outcol = mix(outcol, noiseColor, overlayNoise);

//reset alpha to prevent coloring transparent pixels
outcol.a = pixcol.a;

//output the final color
gl_FragColor = outcol;
}
I'm still learning the ins and outs of shaders so this probably isn't the best way to do this, but for now it seems to be working out fine.

Along with this shader there is some code in my "Combatant" component to control the shader. The Combatant has a timer that is set whenever it takes damage. This timer is then used to control various parameters on the shader. Every 2 frames the image is inverted using the shader. When the image is inverted there's a red additive color blend applied to the image, and when the image is not inverted there is a normal red color mix applied. The intensity of the color mix is determined by the timer. It starts very intense then fades away.

On top of that another texture is blended with the image. The other texture is just a simple image of generated noise. I'm not totally sure why, but for some reason I like the noise texture along with the rest of the effects. It kind of represents a disruption to the target taking damage, or something poetic like that.

Last but not least the image also shakes around a bit. This is something I first noticed a lot while playing Street Fighter 4. An action freeze along with sprite shaking is an incredibly useful way to convey an intense impact.

Here's the little blurb of code that handles the effects for Combatants
//Handle graphics
foreach (var img in Images) {
var overlay = Util.ScaleClamp(StunEffect, 0, StunEffectMax, 0, 0.5f);
var color = new Color(Color.Black) { A = overlay };
var addColor = new Color(StunColor) { A = overlay };

img.Shader.SetParameter("overlayNoise", overlay * 0.5f);
img.Shader.SetParameter("noiseX", Rand.Float(0, 0.25f));
img.Shader.SetParameter("noiseY", Rand.Float(0, 0.25f));

if (StunEffect > StunEffectMax * 0.25f) {
addColor.A = 0.5f;
color = G.Colors.Dark;
color.A = 0.25f;
img.Shader.SetParameter("inverted", StunEffect % 4 > 1 ? 1 : 0);
}
else {
img.Shader.SetParameter("inverted", 0);
}

img.Shader.SetParameter("overlayColor", color);
img.Shader.SetParameter("additiveColor", addColor);

img.Shake = Util.ScaleClamp(StunEffect, 0, StunEffectMax, 0, 30);
}
Along with the impact effects the Bullet entities have an impact effect to help show damage. If bullets hit something and deal damage they spawn a small red and yellow explosion, and if they don't do damage then the particle is blue and cyan. This is something I saw when I played a lot of Thunder Force III as a kid!